/
Configuring Linked Issues Table Gadget
Configuring Linked Issues Table Gadget
- Angela
- Joen
Owned by Angela
Before you begin
- Make sure you've configured the free license key.
- Make sure you’ve configured a data source to be used in the gadget.
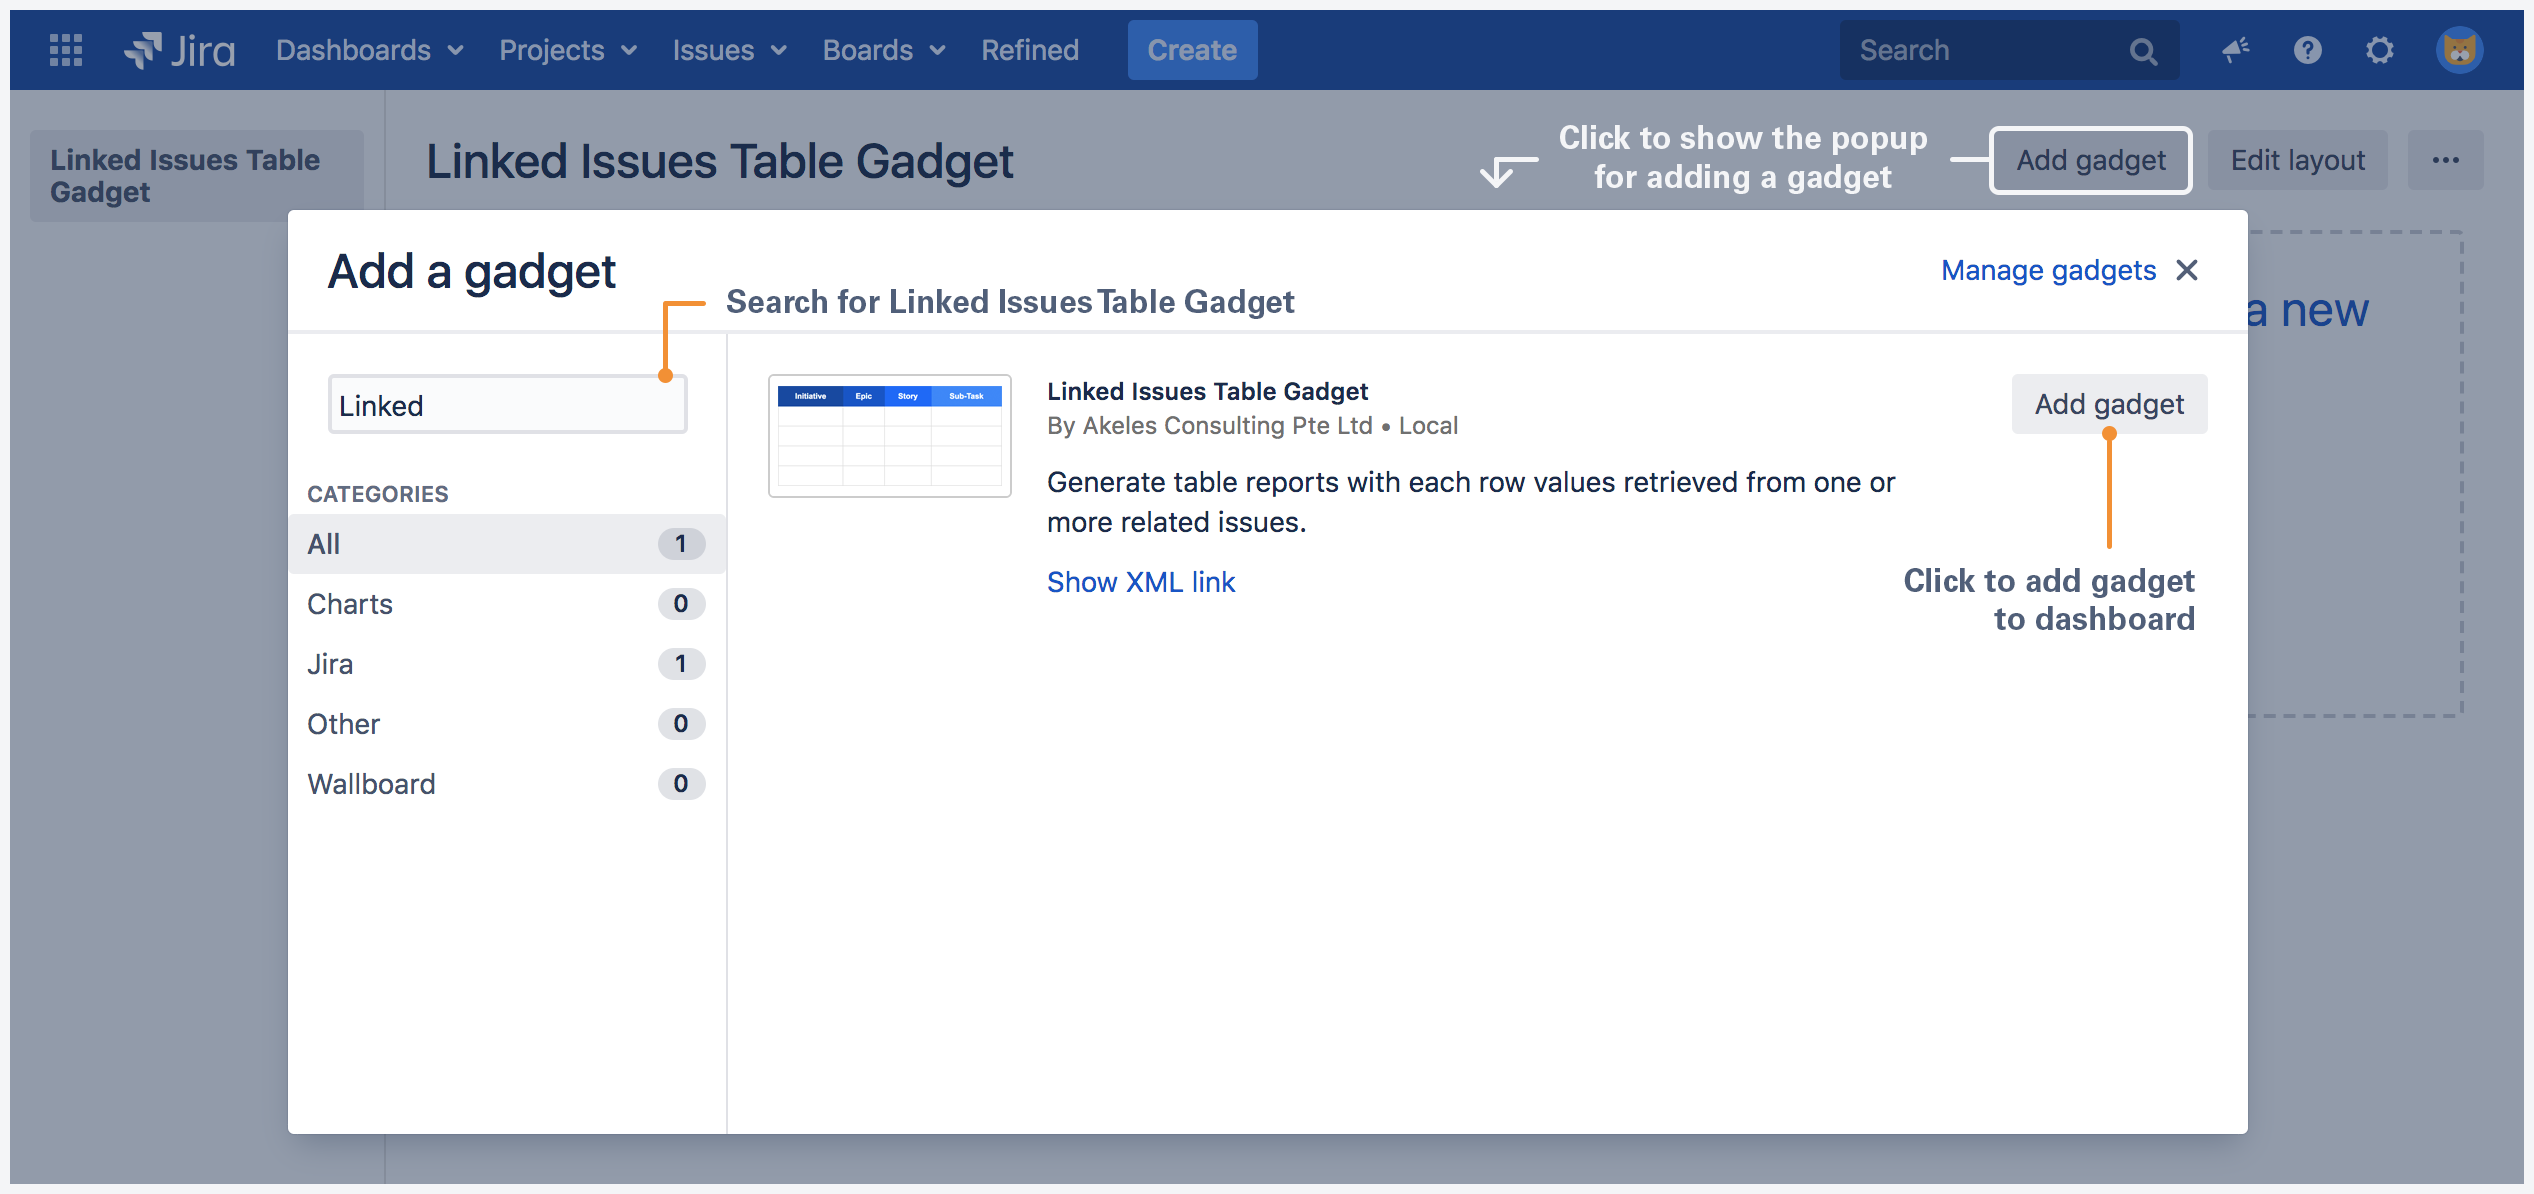
Adding Linked Issues Table Gadget to a dashboard
Go to a dashboard and click on Add gadget.
Search for Linked Issues Table Gadget and click on Add gadget next to it.
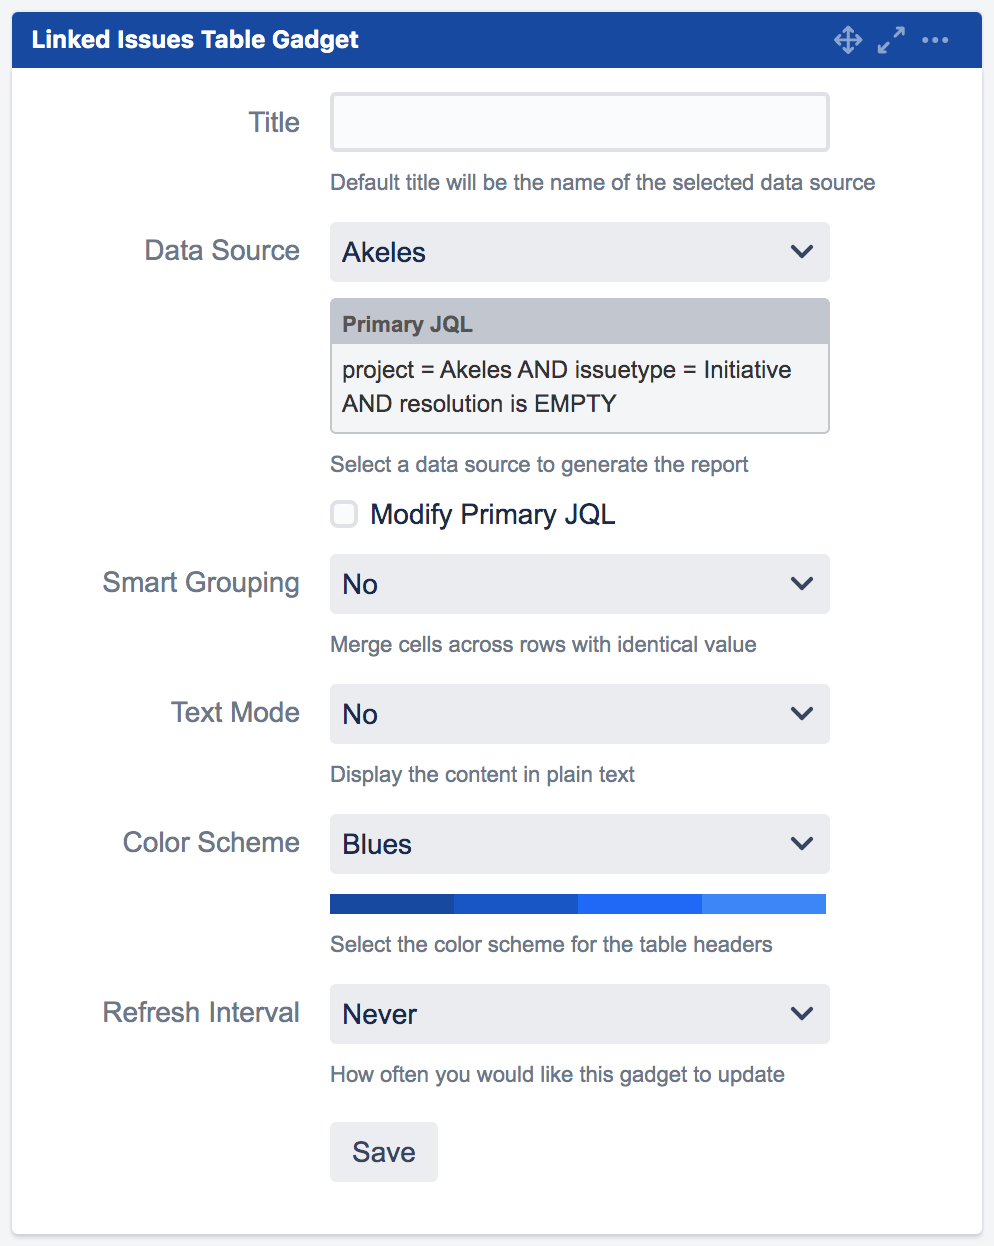
Linked Issues Table Gadget configuration
| Settings | Description |
|---|---|
| Title | The title of the gadget |
| Data Source | Select a data source to generate the report |
| Modify Primary JQL | Check the checkbox to modify the primary JQL of the selected data source |
| Primary JQL | This will only be displayed if Modify Primary JQL is checked Limit the primary set of issues by adding more criteria to the primary JQL |
| Smart Grouping | Select whether to merge cells across rows with identical values
|
| Text Mode | Select whether to display the content in plain text
|
| Color Scheme | Select the color scheme for the table headers
|


Related pages
Related content
Configuring data source
Configuring data source
Read with this
Configuring Linked Issues Table Gadget
Configuring Linked Issues Table Gadget
More like this
Tissue Reports in projects
Tissue Reports in projects
Read with this
Tissue Cloud - Table of linked Issues for Jira Cloud
Tissue Cloud - Table of linked Issues for Jira Cloud
More like this
Configuring free license key
Configuring free license key
Read with this
Tissue - Table of linked Issues
Tissue - Table of linked Issues
More like this