User Guide for Attachment Checker for Confluence before version 1.4.0
- Log in as a Jira administrator to carry out the following instructions.
- Ensure that the plugin version to be installed is compatible with your Confluence version. (View: Compatibility matrix)
Install Plugin
Confluence Administration > Add-ons > Atlassian Marketplace > Find new add-ons
By Searching in Atlassian Marketplace
- Go to Find new add-ons
- Search for Attachment Checker in the search field
- Click Free trial or Buy now to install, configure and start using
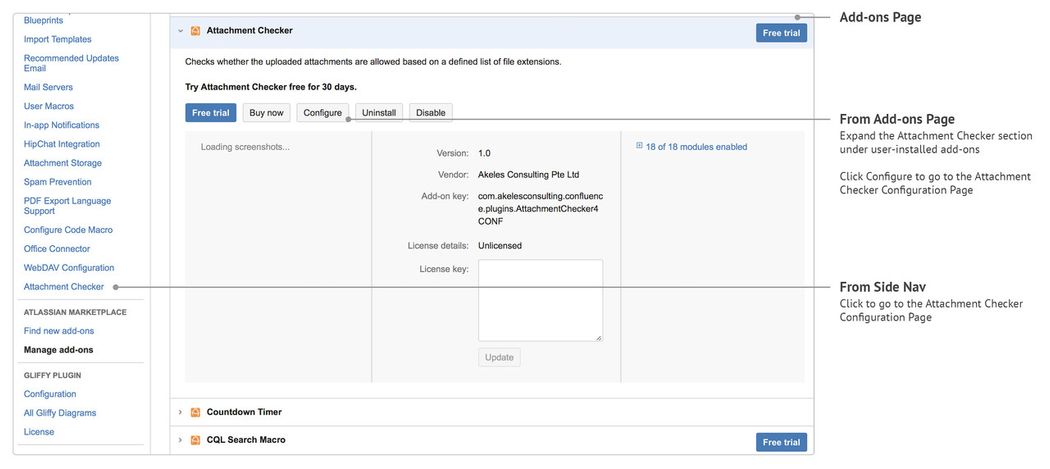
Confluence Administration > Add-ons > Atlassian Marketplace > Manage add-ons
By Upload
- Download the latest version from Marketplace
- Go to Manage add-ons
- Click on Upload add-on
- Select the .jar file
- Click Upload
- The Attachment Checker should be installed
- Click on Free trial or Buy now to configure and start using
*The Attachment Checker for Confluence offers a free trial for 30 days.
Configuration
Accessing the Configuration Page
Configuration Settings
The settings are organised into the following tabs:
- File Type Blocking
- Virus Scanning
- Quota Checking
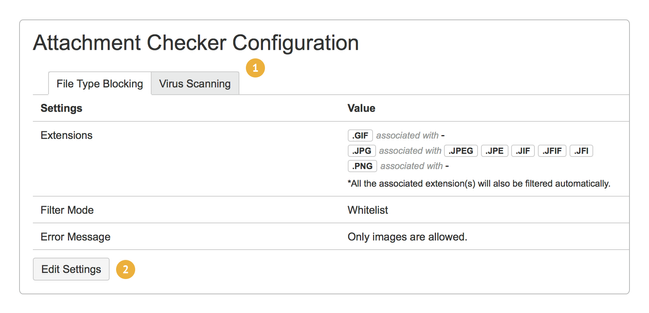
File Type Blocking
To block file types based on the configured whitelisting/blacklisting rules.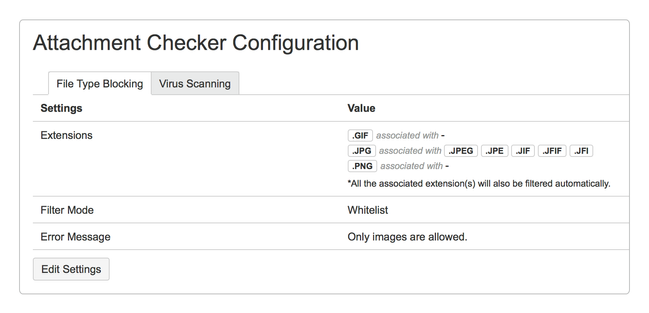
| Field Name | Required | Default Value | Explanation |
|---|---|---|---|
| Extensions | jpg | The list of extensions to be used for filtering. | |
| Filter Mode | Whitelist | Choose a filter mode:
| |
| Error Message | This file type is not allowed. | The message to be displayed when a file attached is not allowed. |
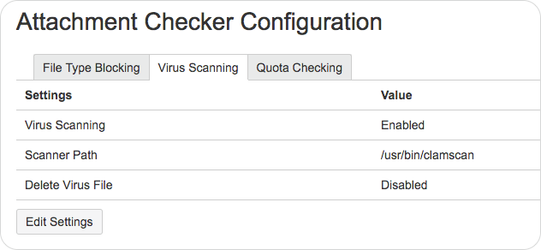
Virus Scanning
To scan all uploaded attachments for virus threats.
| Field Name | Required | Default Value | Explanation |
|---|---|---|---|
| Virus Scanning | Disabled | Select whether to enable the scanning of attachments:
| |
| Scanner Path | The full path to the scanner. | ||
| Delete Virus File | Disabled | Select whether to auto delete an infected attachment:
|
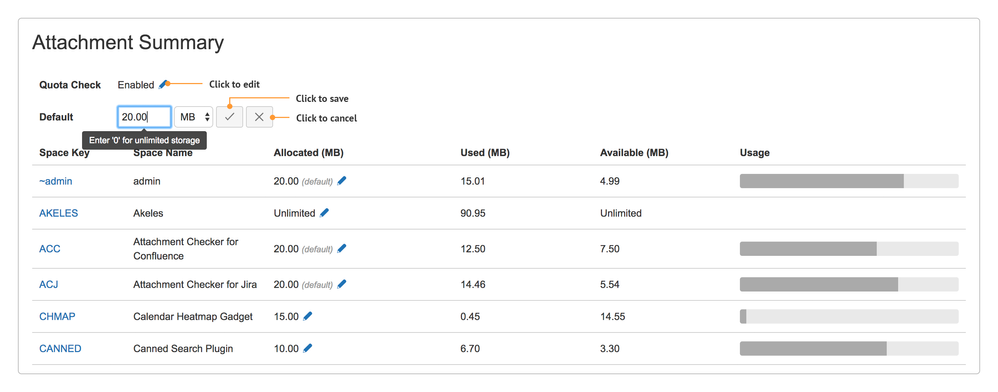
Quota Checking
To control the amount of attachments uploaded in each Space.
To set the attachment quota for each Space individually, click on Edit Space Quota button to go to the Attachment Summary page.
| Field Name | Required | Default Value | Explanation |
|---|---|---|---|
| Quota Checking | Disabled | Select whether to enable the quota checking:
| |
| Default | Unlimited | Enter default quota (rounded up to 2 decimal place):
| |
| MB | Select preferred unit to use:
| ||
| Error Message | Insufficient storage available. | The message to be displayed when the file size of a file attached is greater than the storage space available. |
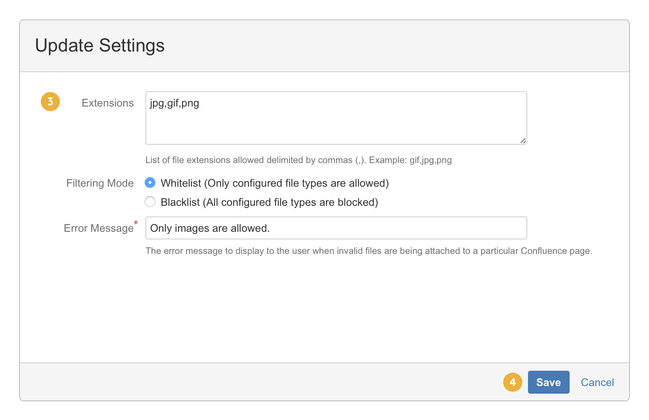
Update Settings
*Only System Administrators are allowed to update the settings.
- Click on the tab that you wish to edit.
- Click on the Edit Settings button.
- Make the necessary changes to the form.
- Click on the Save button.
Attachment Quota
Click on the pencil icon to edit.
Make the necessary changes to the form.
Click on the tick button to save or cross button to cancel.
If the attachment quota for a particular Space is not set, the default attachment quota will be used.