...
...
...
...
...
| Note |
|---|
This is only available from version 1.1.0 onwards. |
| Info |
|---|
Before configuring the post function, make sure you have added and configured the row headings of the Properties Table Custom Field. Not sure how? Refer to the following |
...
: |
...
...
...
Adding Post Function
...
In your workflow, select the transition you would like to add the post function in, select Update Properties Table Custom Field, then then click Add.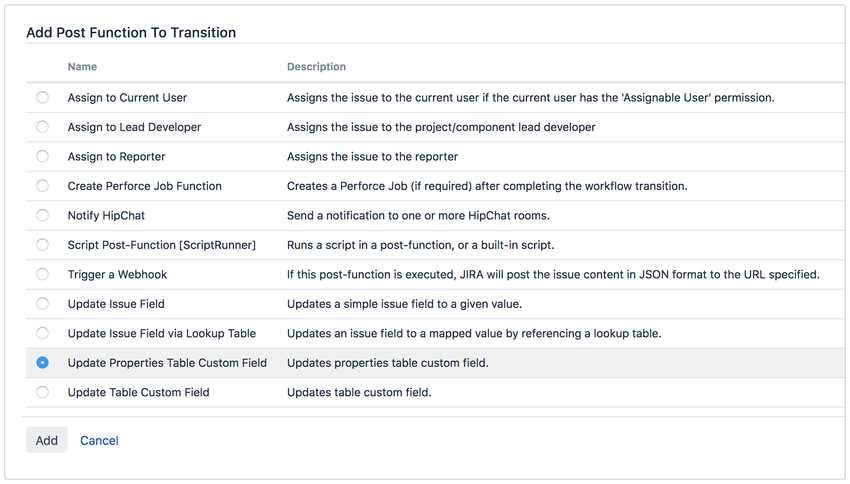
...
Fill in the required fields for the post function, then click Add.
...
Fields | Description |
|---|
Action | Select the action to execute |
:
| |
Properties Table Custom Field | Select the Properties Table Custom Field |
to execute the action | |
Configuration Scheme | Select the |
configuration scheme for the selected |
custom field | |
Values | Select the values for each row |
- No Change
- Blank
- Current Date Time
- Current User
- Assignee
- Reporter
- Status
- Comment
- Attachment
- Custom Field
- String
:
|
Select whether to get value before or after the transition:
|
![]() denotes the fields required for each action.
denotes the fields required for each action.
Action | Update | Purge |
|---|---|---|
Properties Table Custom Field |
|
|
Configuration Scheme |
| |
Values |
|
Post Function values
The following table explains each of the value options.
If there is an existing value, it will remain unchanged.
If there is no value, it will be blank.
The date/time when post function is being executed.
e.g. 25/06/2018 15:04:17