How to use Canned Search for an Customer Helpdesk
The Canned Search Gadget is designed to empower Jira users to search for issues quickly without the need to re-enter all the same criteria again every time.
Scenario
When a help desk officer picks up a call, he will need to find all outstanding tickets reported by caller. He can find it via 2 methods.
Method 1: Quick Search
- Enter the name of the customer in the Quick Search box
- Filter out the correct Jira project and issue type visually
- If necessary, need to click on the issue to display the custom fields
Method 2: To enter the issue navigator to fill in the search criteria
- Enter issue navigator
- Select the project
- Select the issue type or request type
- Select the customer name custom field
- Enter the customer name in the customer name box
With Canned Search Gadget, it is only required to
- Enter the customer name
- Click on search
How to do it
The Canned Filter adapts an existing Jira filter and allows you to select which fields to be displayed for searching and which fields to stay fixed
- Create a new Canned Filter by adapting an existing filter
A possible filter could be: (1) to list out all the Delivery issues from (2) Support Project that has (3) not been resolved (Resolution is empty) and the (4) Customer Name contains Bruce
project = support and issuetype = delivery and "Customer Name" ~ "Bruce" and resolution is empty
- Let's called this saved filter as Outstanding Delivery Issues
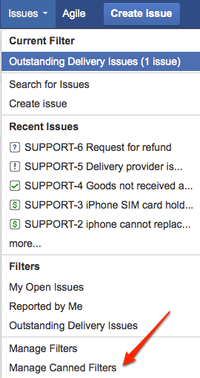
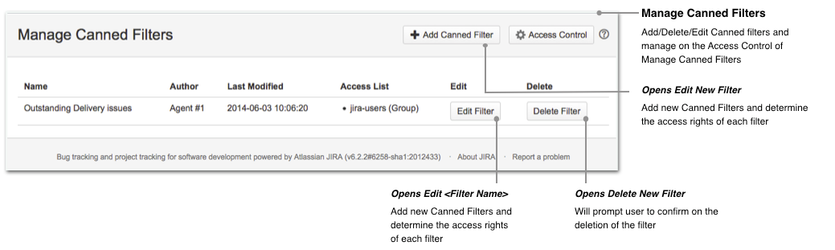
- Select Manage Canned Filters under the Issues menu
- Click on Add Canned Filter
- Select the filter to be adapted from (e.g. Outstanding Delivery Issues). It is also possible to draft the JQL directly too
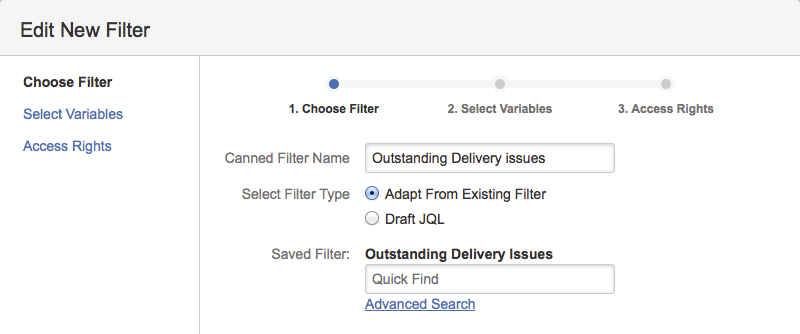
- Then click on the Select Variables link to proceed to step 2

Set the Customer Name field to be dynamic by clicking on the corresponding Select checkbox
A) -> The original value is replaced with an underline
B) -> It is possible to select the type of input box in the search gadget for that field
C) -> It is possible to display another name in the search gadget for that field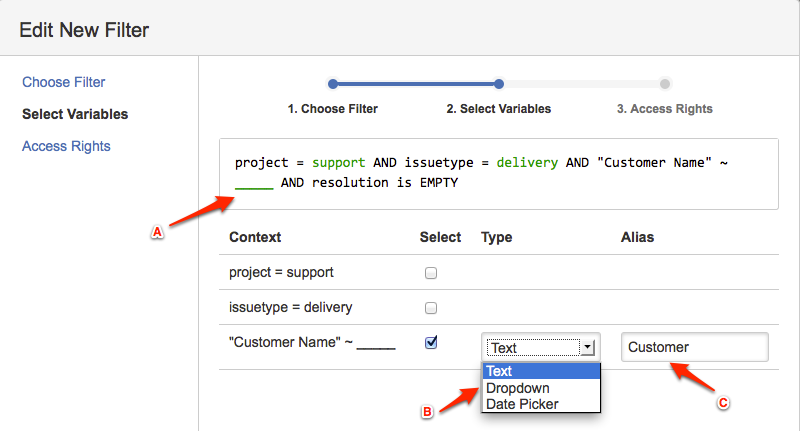
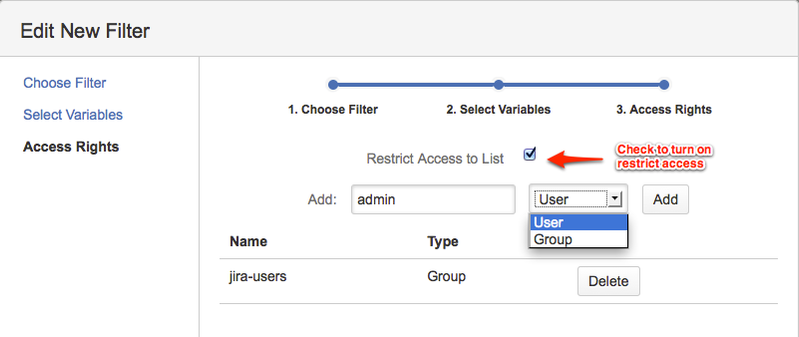
- Click on Access Rights link for step 3
- You can configure which user or groups will be able to use that Canned Filter. Remember to check the Restrict Access to List box if you want to restrict viewing.
- Click on Save button to save. The list of Canned Filters is updated
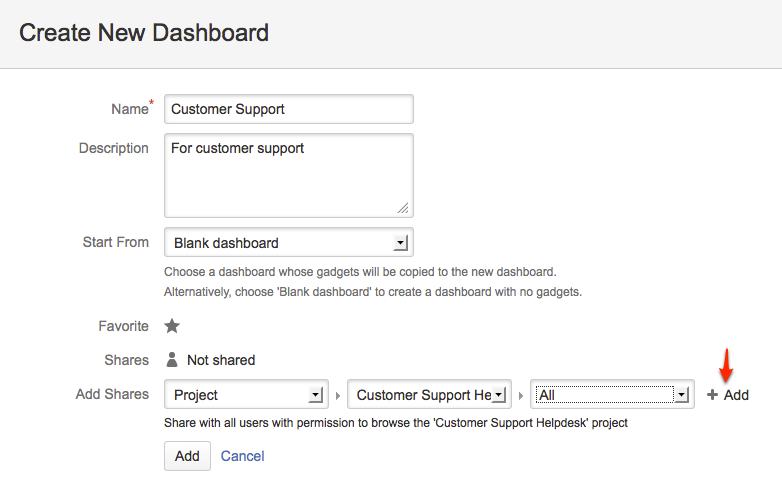
- Create a dashboard named Customer Support
- Select from the Tools menu at any dashboard
Enter the details as shown in the screen below and click on the Gray Add button
If you want to limit access of this dashboard to the Customer Support Helpdesk, rememember to click on the + Add button indicated by the red arrow
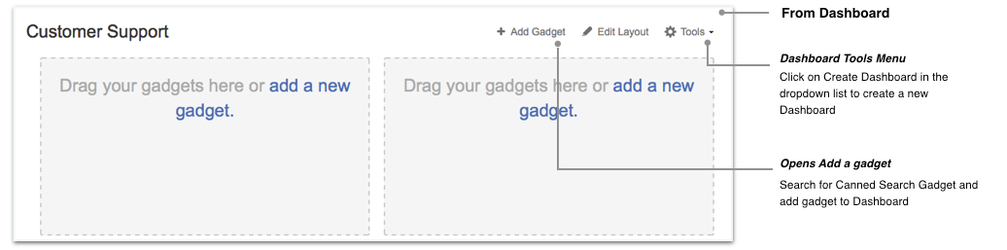
- Select from the Tools menu at any dashboard
- Add a Canned Search Gadget into the dashboard
- Click on the Add Gadget link to bring up the Gadget Directory
- Click on the Add Gadget link to bring up the Gadget Directory
- Type in Canned to filter the search and click on the Add gadget button to add it to the dashboard
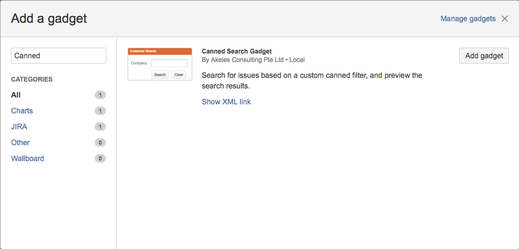
- Click on the Close link at the bottom right to go back to the dashboard
- Type in Canned to filter the search and click on the Add gadget button to add it to the dashboard
- Configure the Canned Search Gadget
Fill in the configuration as below
You can add instructions which will appear on the gadget. You can also add fields to display for the search results.
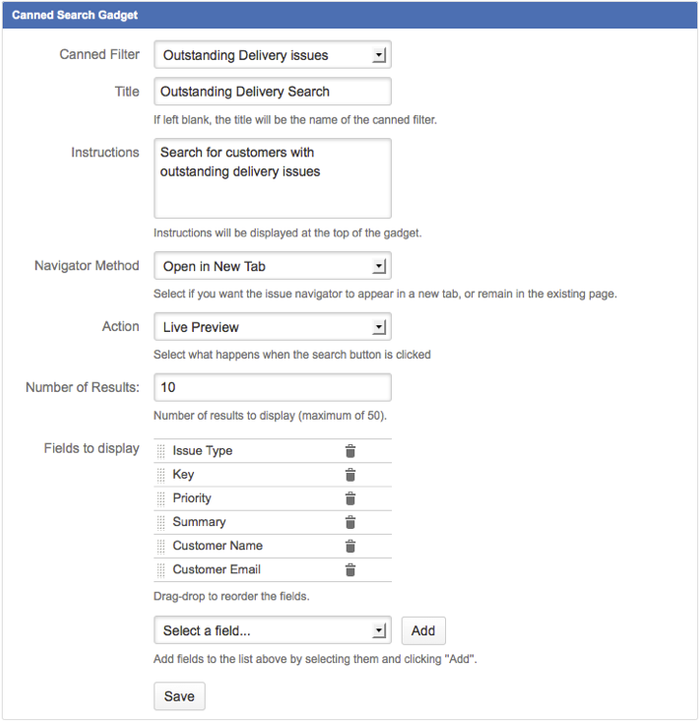
- Click on the Save button
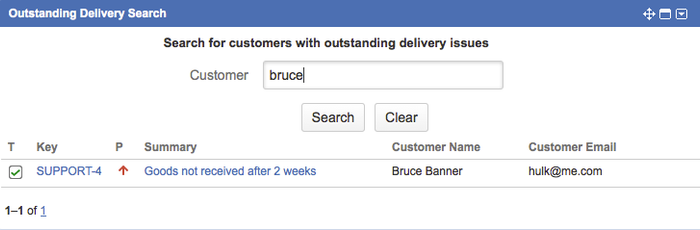
- Result on Dashboard
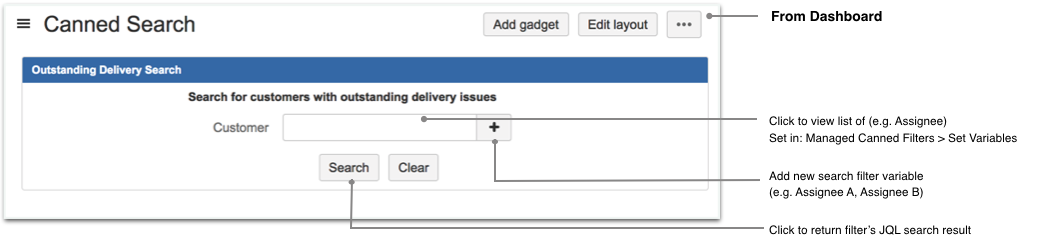
- To search, you only need to enter the name of the customer and click Search