Background
...
| Panel | ||
|---|---|---|
| ||
|
Introduction
It is possible to enforce different permissions for selected groups of users. This is useful for scenarios like
- Increase the upload limits for Confluence admins to handle exception scenarios
- Only the media team users can upload videos files which are large in nature
- Restrict maximum size of images (png/jpg/gif) to 100kb, but allow PDF files to be up to 10mb
- Limit customers to upload image files only whereas staff can upload pdf and office documents as well
- Preventing abuse where users upload large zip files onto Confluence as their backup drive

How to change the setting
- Log in as Confluence administrator
- Go to Confluence Administration > Attachment Checker > Configuration
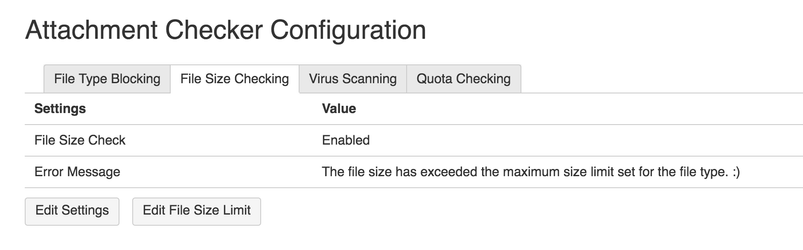
- To enable/disable this feature, click Click on the Edit Settings button to
- Enable/Disable checking of file size limit based on groups
- Change the Error Message if the file size limit has exceeded
- To edit the file size limit, click on the Edit File Size Limit button
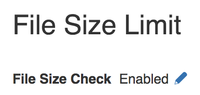
Editing File Size Limit
Each File Size Limit rule consist of the following components
| Attribute | Description |
|---|---|
| Extension | The file extension applicable for this rule |
| Maximum Size | The number that specify the maximum size of the file. It can only accept integer values. If you want to block upload of the type, you can use 0 |
| Unit Size | KB or MB |
| Tip | ||
|---|---|---|
| ||
A possible File Size Limit rule will be members of the staff-users group in Confluence can upload mp4 file type with file size up to 100 MB |
The following operations are available in this screen
Enable/Disable the file size checking
- Click on the pen icon
- Select the option in the radio button
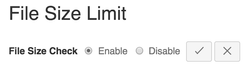
- Click on the Tick icon to save the change
Change the group associated for the Group 1
The default group associated with Group 1 and Group 2 are confluence-administrators and confluence-users respectively. It is possible to switch to other groups.
- Click on the pen icon beside the group name

- Type to search for groups with matching name
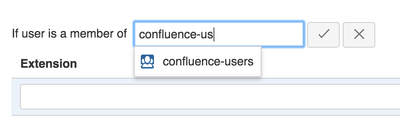
- Select the group

- Click on the Tick icon to save the change

Add a new File Size Limit Rule for the group
- Enter the values at the top row of the group

- Click on the Add button on the first row of the section

Edit a File Size Limit Rule for the group
- Find the rule to be edited

- Mouse over the row to be edited. A pen icon will appear

- Click on the pen icon to toggle edit mode

- Update the value
- Click on the Update button to save
Delete a File Size Limit Rule for the group
- Click on the Delete button at the right side of the row

How it works
- The default setting for Group 1 is confluence-administrators group
- The default setting for Group 2 is confluence-users group
- When a file is uploaded, it will determine the user performing the upload belongs to which group. The sequence of checking is in the workflow diagram below
...